
When Griffin & I got married, our bedroom set was a shiny, girly white set that I picked out when I was in junior high. Ok, so it wasn’t that bad for me, but my poor husband. What a great guy to endure the girliest bedroom set possible for almost 3 years! Don’t get me wrong, we both were very thankful to even have furniture at that time. We got married while we both were still in school. Griffin was interning at our church youth group while working part time for a marketing company, while I was working 8-10 hours a week making just above minimum wage. At that time, we really had no other choice but to live with this junior high girl’s dream of a bedroom or to sleep on the floor & live out of suitcases (oh wait, we didn’t even have suitcases). Well, you get the point.
About a year & and half ago I asked for a headboard for my birthday present from my brother-in-law & sister. My brother-in-law is a pretty good handyman, & my sister is craftier than I’ll ever be! I was so excited to finally have a REAL headboard that both Griffin & I would love & could hang on to for a LONG time! Well, time went by, I still didn’t have my headboard, & we found out we were moving to Arizona. Griffin & I decided that our stuff wasn’t worth spending the money to move, so we sold almost everything we owned. We sold my car & moved from MO to AZ in Griffin’s Nissan Sentra. We weren’t pulling a trailer or anything… needless to say, our car was packed to the brim.
Fast-forward almost a year, we FINALLY built our own headboard!! My father-in-law, Dave, loves woodworking & had all the right tools we needed to build one. We used Knotty Alder wood because Dave had some already & it’s a great wood to alter to look like another type of wood. We started with tall planks that we cut down to the right size & sanded it with some rough grit paper to make it look old, rustic, & uneven.
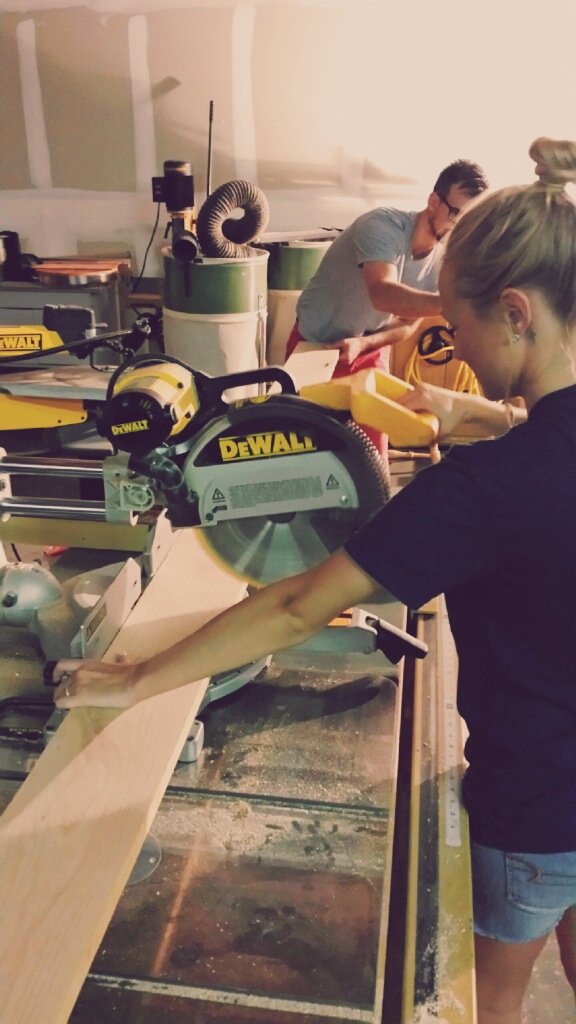
We also made the posts out of the alder, but I won’t even try to explain that process to you. Dave did most of that. After creating the rustic look with the rough grit sandpaper, we took more fine sandpaper to smooth everything out by hand. We then decided the pattern the boards would be in & measured everything more than once! Griffin & Dave made the holes for the screws as well as the wood plugs.

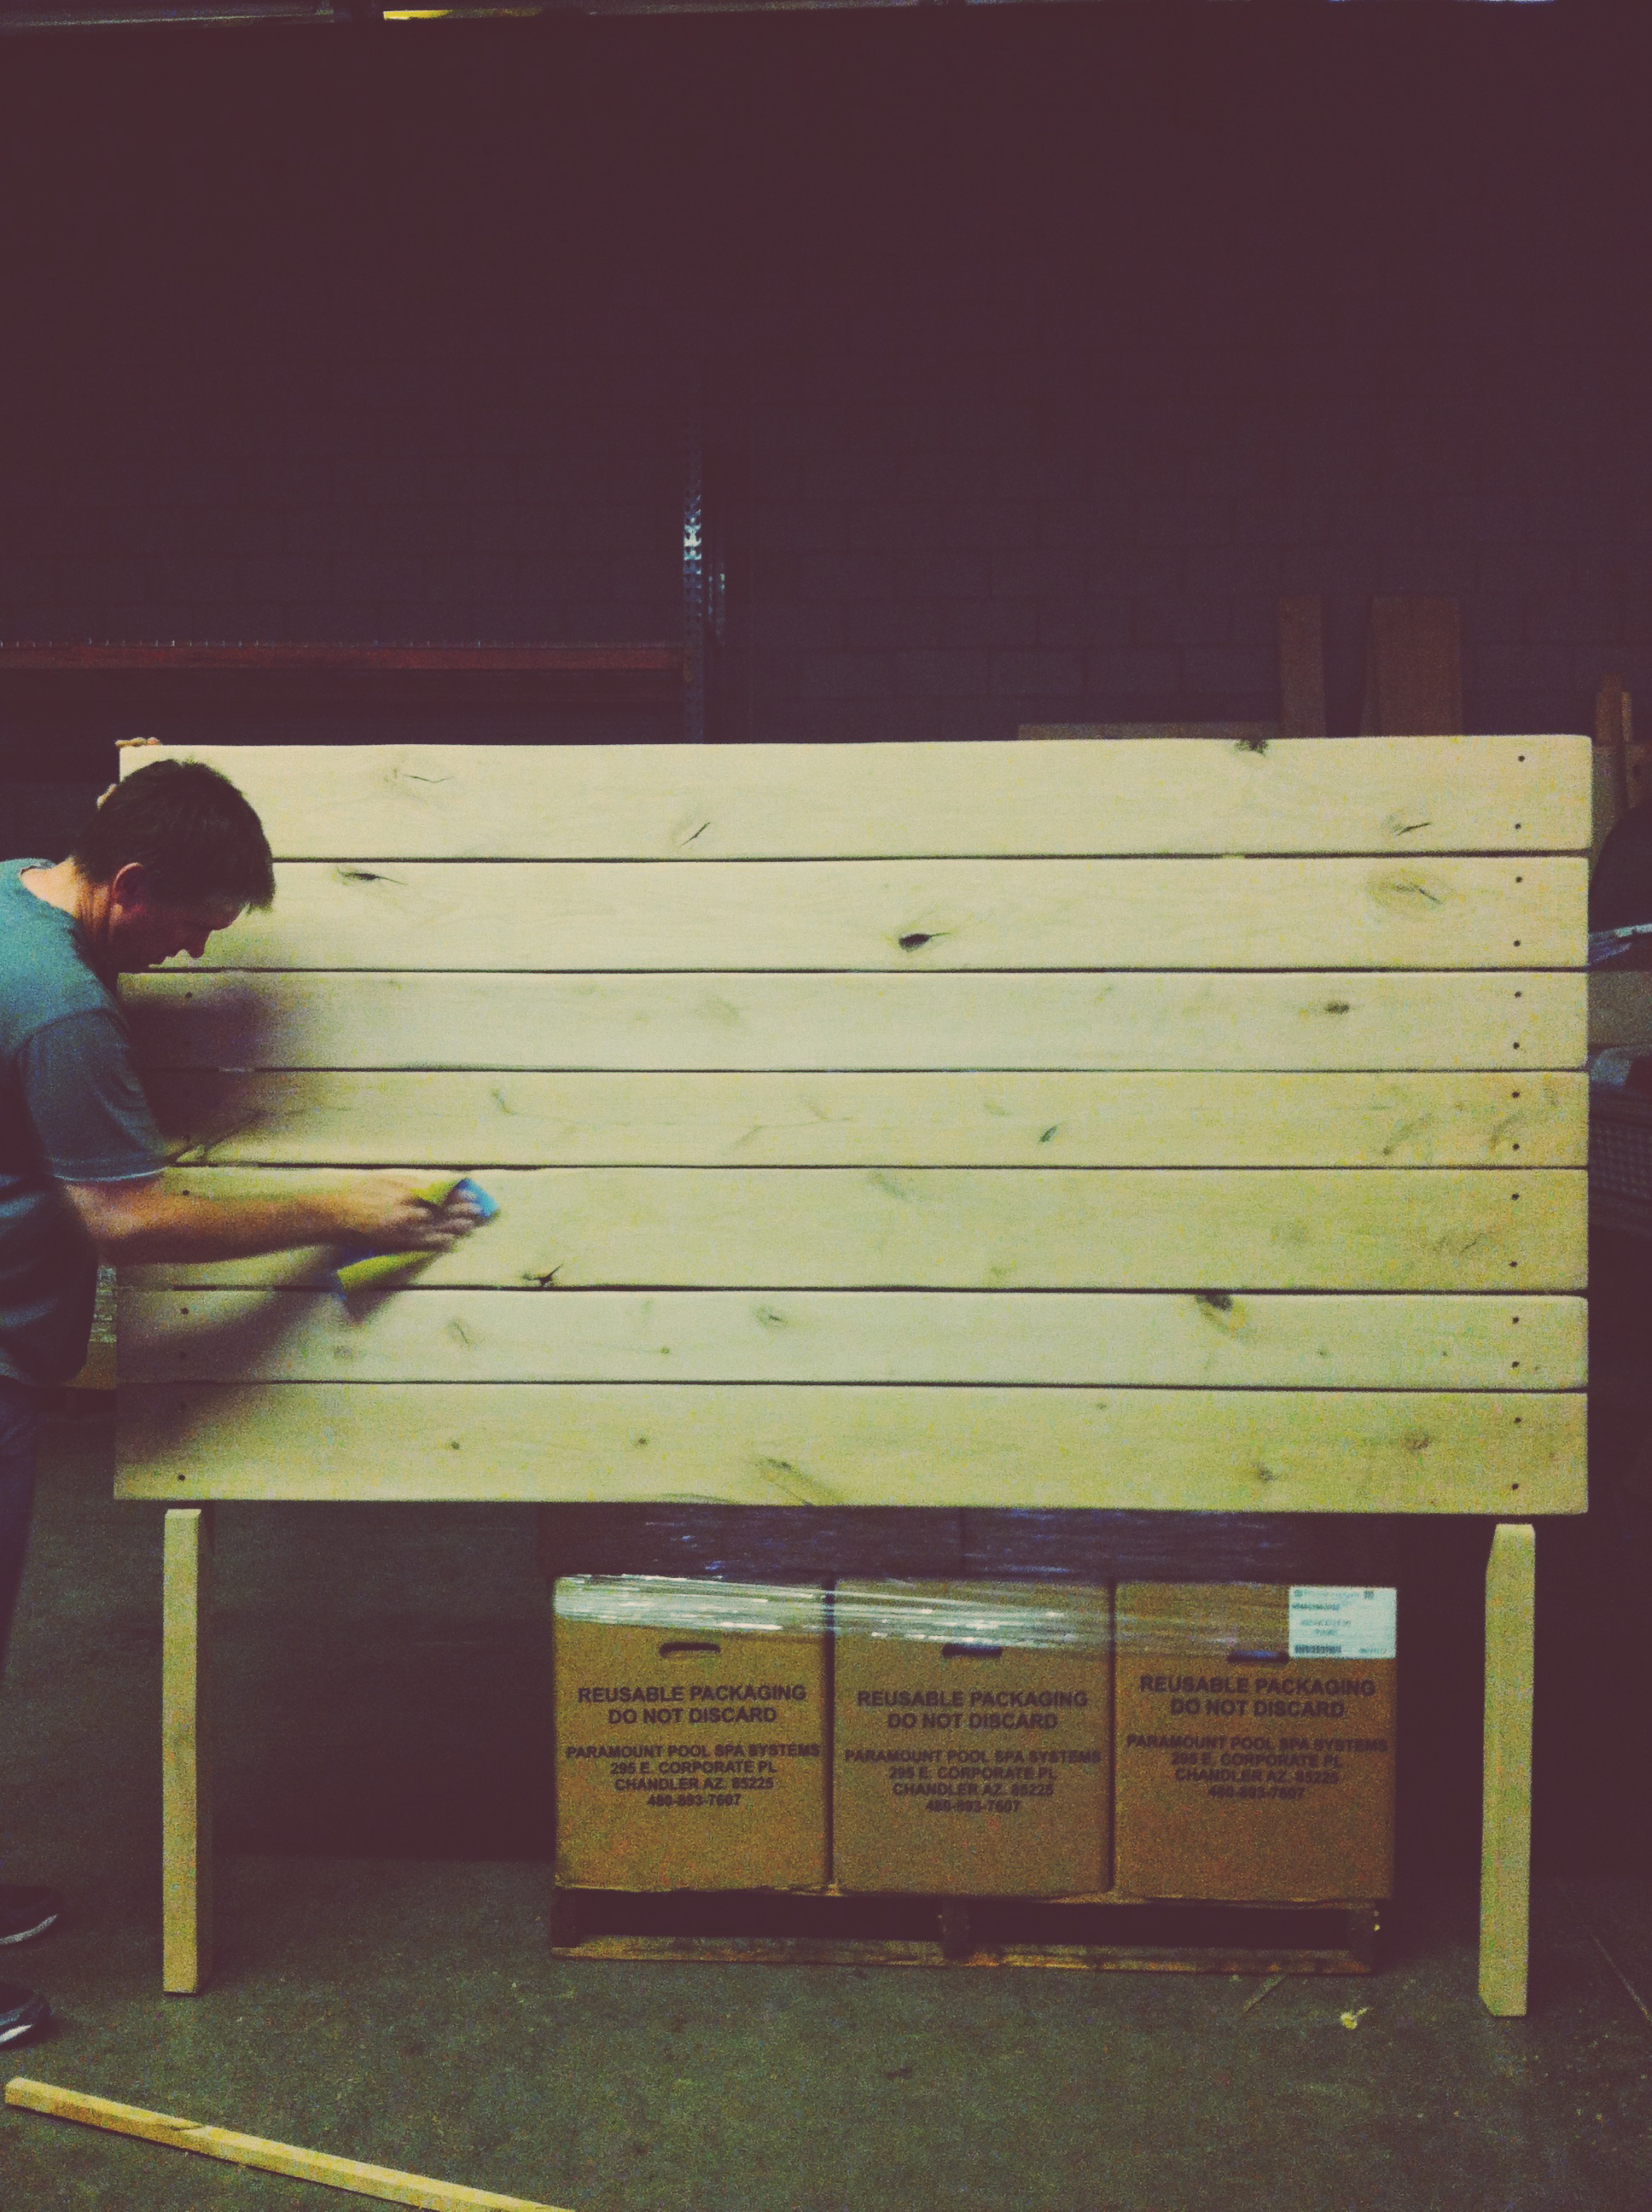
Below is the headboard all put together BEFORE staining it. We put it together to make sure everything was perfect, then took it apart to stain & coat it with polyurethane. I did one coat of a Walnut stain applied with a sponge. One coat was all it needed. The next steps were painting on the polyurethane with a good brush. I did two coats to make sure it lasts a long time & has a nice finish to it. I also made sure to stain & paint the wood plugs.
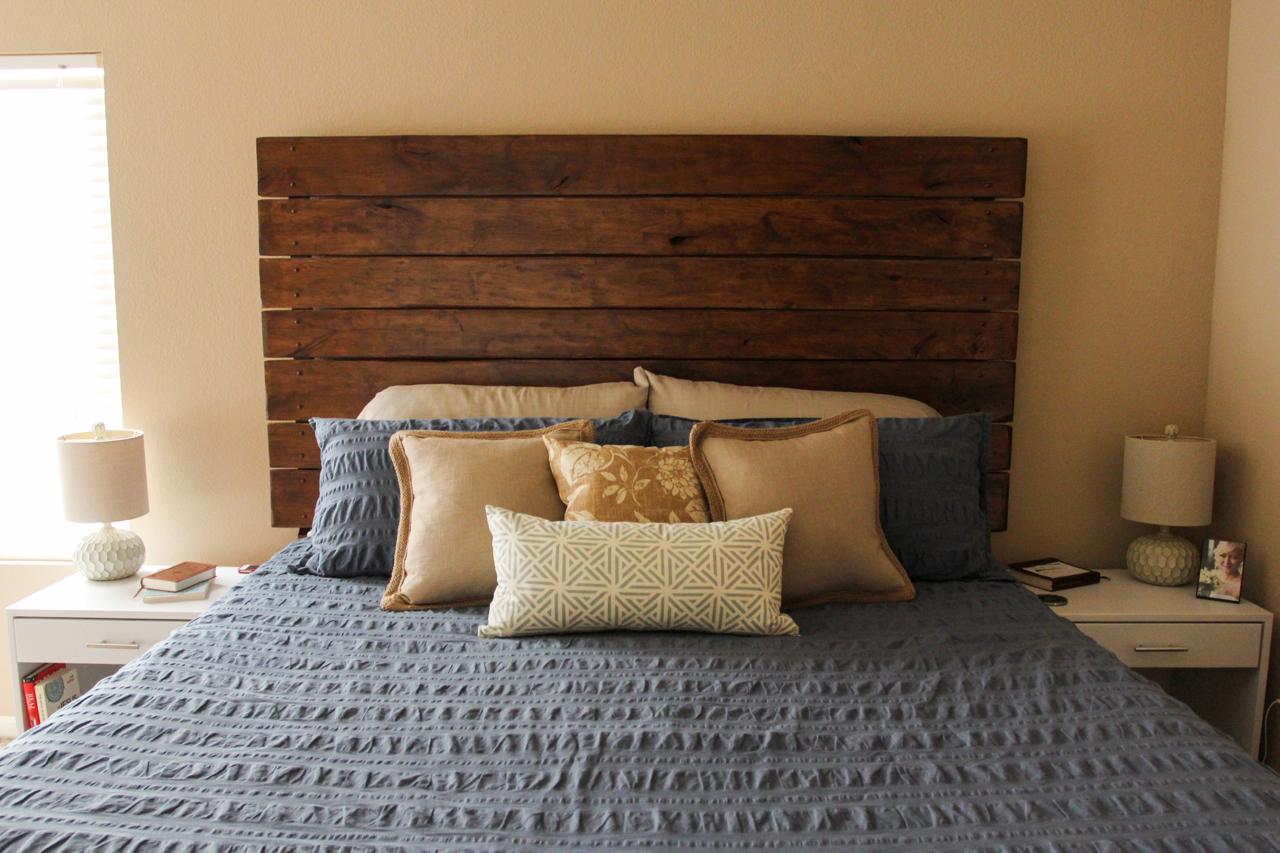
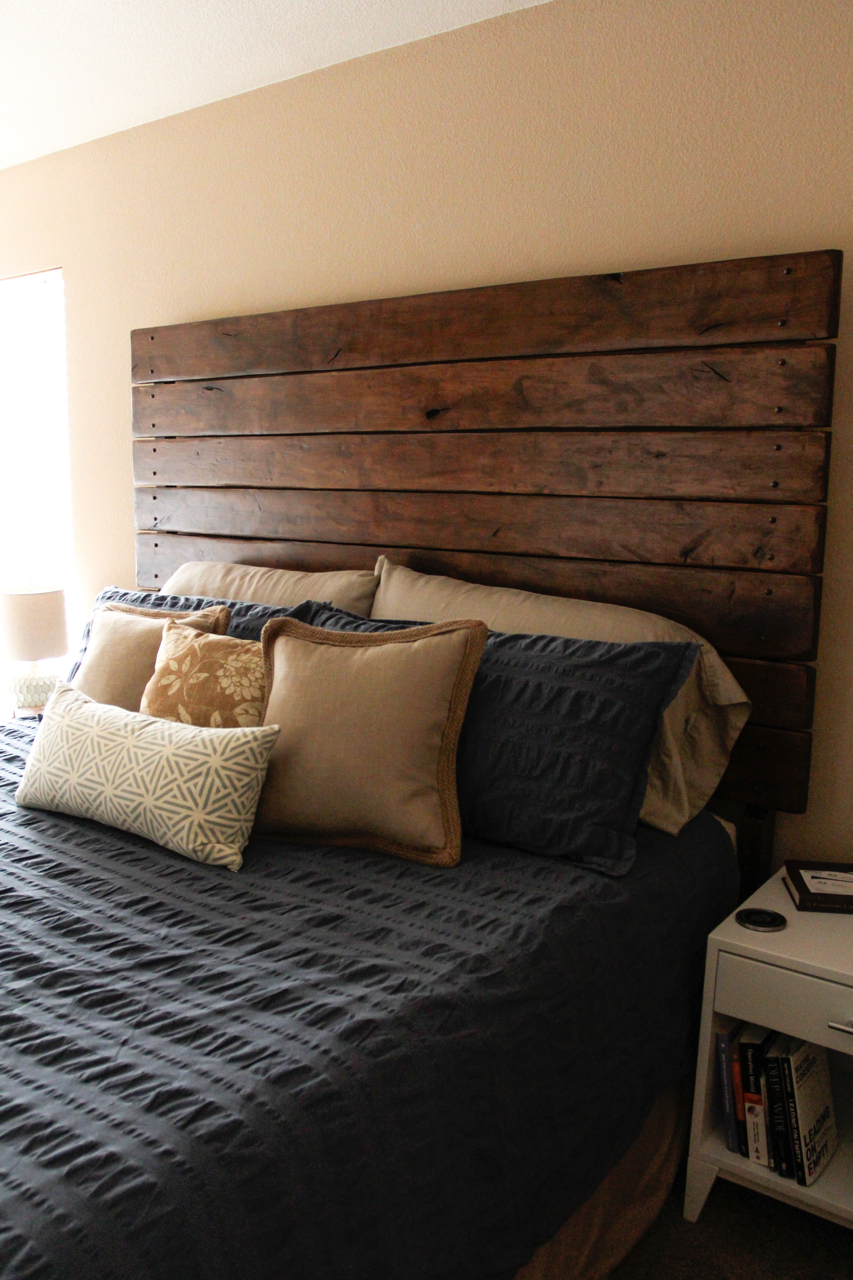
Here are the AFTER photos:


Good for you! Looks great!
Yaaay! It looks awesome B! :) You guys did such a great job on it. Your new home is comin together!
Thanks Jes! It was so much harder than I imagined! But I’m so happy we did it. I can’t wait until our house is complete.
Looks so good! I really love how the planks are separated just a few inches instead of all pressed together.
-Courtney
Thanks Courtney! Yes, we thought maybe we would separate them more, but it looked cheap doing that, & I liked a little separation in between.
Can you make me one, please?? Our blended bachelor-pad-meets-single-girl motif isn’t working for me….
Great job:)
Lol I wish I had the strength & energy to make & sell them! Thank you!!
Hello Bethany!
The headboard looks great! You all did a great job!
Did you attach this to the bed or to the wall? Just curious.
Love,
Aunt Vonnie
Hi Auntie Vonnie! Great to hear from you! We screwed the posts onto the metal part of the bed.
love it! i want this in my room!
I’m definitely a beginner, but I really want to do this. Sorry for ignorant questions…
So, you screwed the boards into the post and then put wooden plugs into the screw? Are those just something you can pick up at Home Depot or anywhere? I know you said you didn’t want to get into details on how the posts were made, but were they really difficult? Seems easy…but that’s what makes me nervous about the whole thing. Most things that look easy, aren’t.
Hi there, so sorry about the late reply. I have been out of town. Yes, we screwed the planks into the posts that we made & picked up the plugs at Home Depot. We had to stain the plugs as well. If you have all of the tools & equipment, then it is possible to make this headboard. We took perfectly squared Alder wood & cut them to size then distressed them with high powered sanders. It takes more time than you would think, & you will need two people so that one person can hold onto the wood while you sand. The posts were probably the hardest though because we rounded the inside to fit the planks, so it required more tools. It took one coat of stain & two coats of Polyurethane. Hope this helps!
I am making this headboard…but I’d really like to know where you got that coverage…it’s beautiful. M
I meant to say bed cover…. darn auto correct
Lol it’s ok. I am pretty sure we got the duvet at Target. The other pillows are from Home Goods. Thank you!
Bethany,
can you give me the sizes of the lumber? and the dimensions? im currently in the process of putting the research together to make my own!
The whole headboard is 83 inches wide. We have a king size bed, so the headboard is a couple inches longer than the bed on each side. Each plank is different in height, ranging anywhere from 5.5 inches to 7.5 inches or so. Hope this helps!
Looks really nice. What size bed is that for? Do u have the dimensions and cut list for it? If not do u know where I could get them at? Thanks Chad
Also what was the cost of the material?
Thank you! The whole headboard is 83 inches wide. We have a king size bed, so the headboard is a couple inches longer than the bed on each side. Each plank is different in height, ranging anywhere from 5.5 inches to 7.5 inches or so. Hope this helps!
Cost of the material was minimal, but the alder wood was something that my father-in-law already had. Depending on what type of wood you use, it could be very budget friendly. :)
Love this! What stain did you use? The coloring is perfect!
Thanks!! I believe we used the Minwax dark walnut stain.
Hello Bethany, I am trying to recreate this headboard for my girlfriend and just wanted to know the specs of the wood you used.
Would you mind telling me the dimensions of the posts and the boards?
Hi there! What a fun project for your girlfriend. You should get an award for making this for her!
Each plank is different in height, ranging anywhere from 5.5 inches to 7.5 inches or so. They are 83 inches in width (of the whole headboard) & a little less than 1 inch thick (close to 7/8 of an inch). The posts are 70 1/2 inches tall from the floor to the top of the headboard. They are the thickest from the floor to the top of the mattress (before the planks are attached) at about 3 inches thick. They thin out behind the planks at 1 3/4 inch thick. I’m not a woodworker or carpenter, so I don’t know how to properly tell you the dimensions, but hopefully that explained it enough for you!
Love how this came out how and what tool u use to make the wood go from 3 in to 1 3/4
Unfortunately, because we had my father-in-law help us, I don’t know the tool names of what we used.
[…] wood plugs used for this headboard complete it! Click here for more […]
I love this. Going to get my husband to build me one like it. Thank for sharing.
Thank you!
Home Depot has boards to look like Barn.boards in different sizes and 3 different colors too…awesome time saver for headboard and other projects.